Documentation
locr Maps for WooCommerce
Search Bar
- Display a search bar by using the code [locrmaps_search] to update the icon location on the map.
Icons
- To add a new icon, upload a .png file to your WordPress media library. You can download free sample icons here.
- Go to Dashboard/locrMAPS/Icons and click on "Upload/Add Image".
- Upload an icon or choose a file from your media library.
- Find the uploaded icon in the list and click on "Edit". Here you can customize the name, scale and anchor of the icon.
- The anchor field edits the point where the chosen icon connects to the map while closing. Options are "Bottom" which anchors the icon at the bottom center and "Center" which anchors the icon in the center of the image.
- Click on "Save Changes".
- Using the code [locrmaps_icons] you can display all uploaded icons in the front end.
- You can customize the icons selection: Go to Dashboard/locrMAPS/WooCommerce and edit the icons section.
- Use the icon names you defined at Dashboard/locrMAPS/Icons.
- These have to be divided with '|' if you choose to display more than one.
- For example: pin | circle | heart
- If the icons section is empty, all icons will be displayed by default.
- Default icons will be displayed as a select box in the front end.
- If you want to display the icons as clickable images, follow these two steps:
- Go to Dashbard/locrMAPS/WooCommerce and for "Layout Selection" choose "WooCommerce Product Property" using the drop down menu.
- Edit your shortcode to [locrmaps_icons styling="wc-product-property"]
Map Styles
- Use the shortcode [locrmaps_styles] o display a style selection on your website.
- Go to Dashboard/locrMAPS/WooCommerce to define which map styles you want to use. By default the map styles 3511, 3513, 3521 and 3571 will be shown.
- The styles you want to select have to be divided with “|” .
- For example: 3511 | 3513 | 3521
- Styles currently available are:
- 3511, which has a faded vintage look,
- 3513, which has a hand drawn black and white look,
- 3521, which is a minimal blue style and
- 3571, which is a comic style.
Click To Show All Available Map Styles
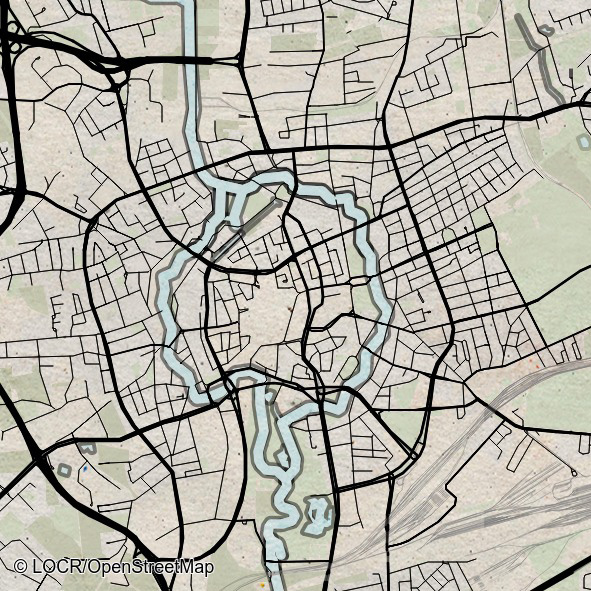
3511
“Vintage”
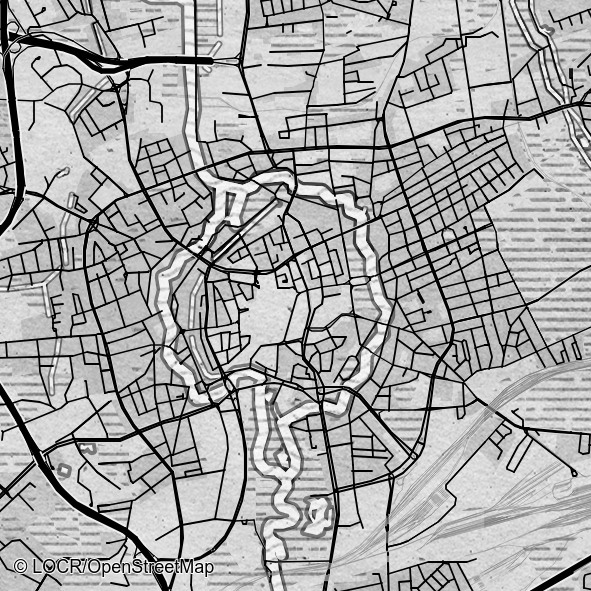
3513
“Handdrawn”
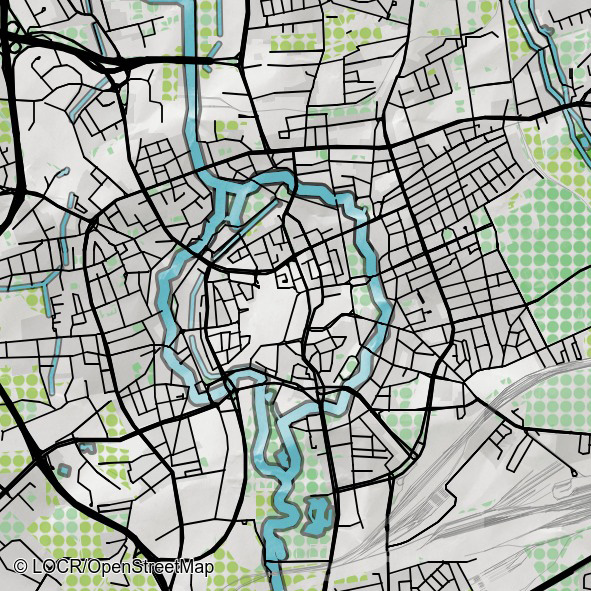
3571
“Comic”
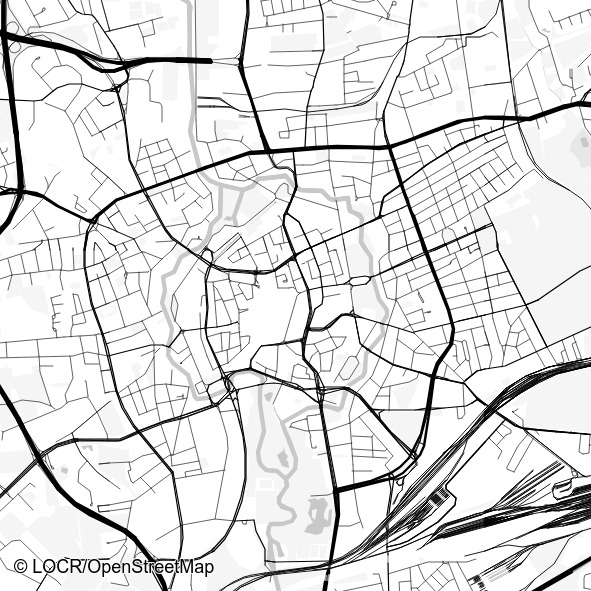
3601
“Minimal Mono White”
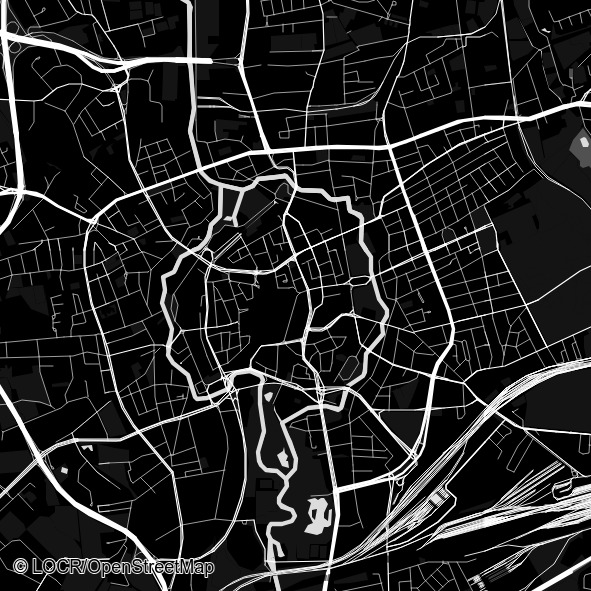
3602
“Minimal Mono Black”
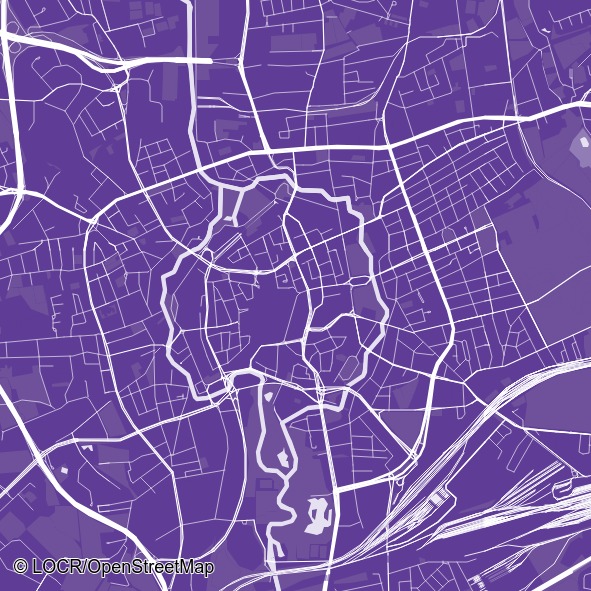
3603
“Minimal Mono Purple”
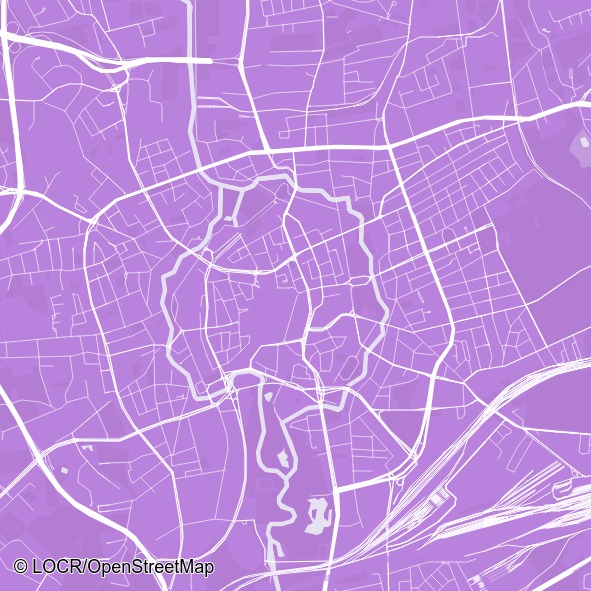
3604
“Minimal Mono Lavender”
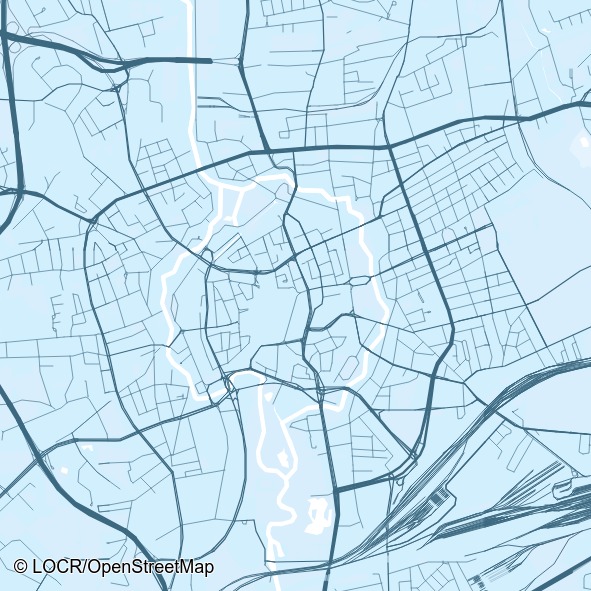
3605
“Minimal Mono Light Blue”
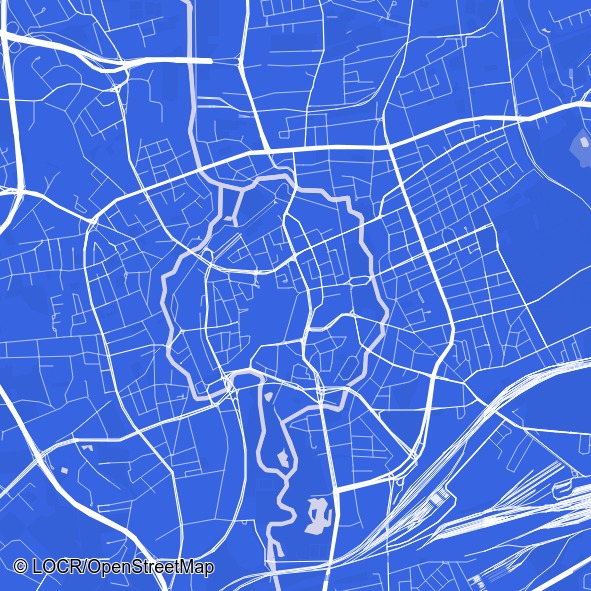
3606
“Minimal Mono Blue”
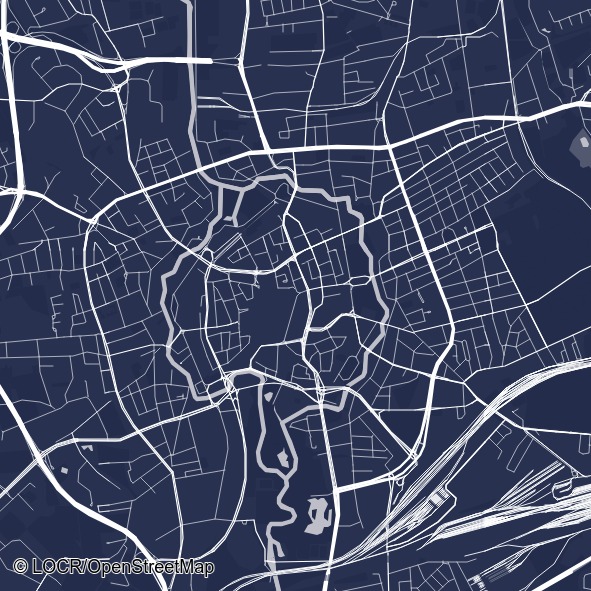
3607
“Minimal Mono Dark Blue”
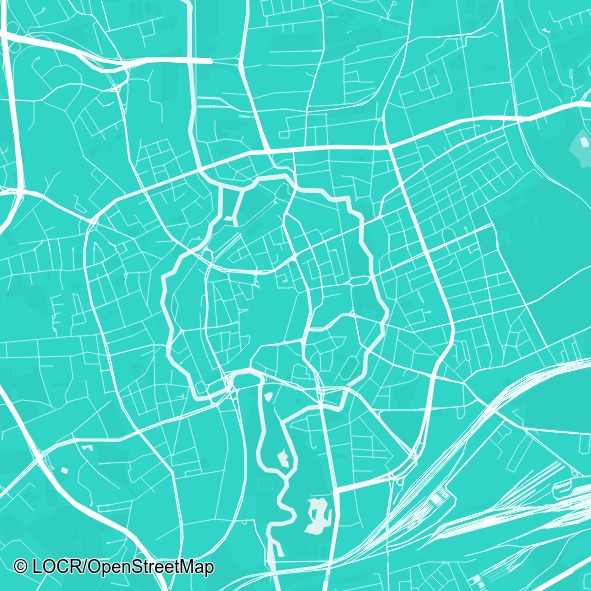
3608
“Minimal Mono Turquoise”
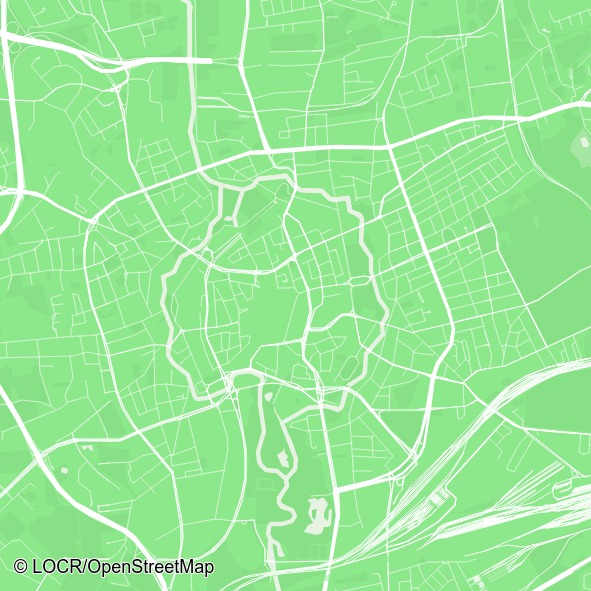
3609
“Minimal Mono Light Green”
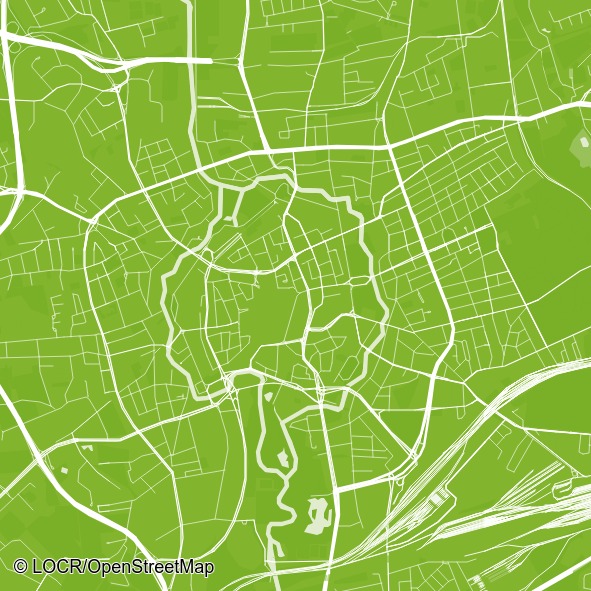
3610
“Minimal Mono Green”
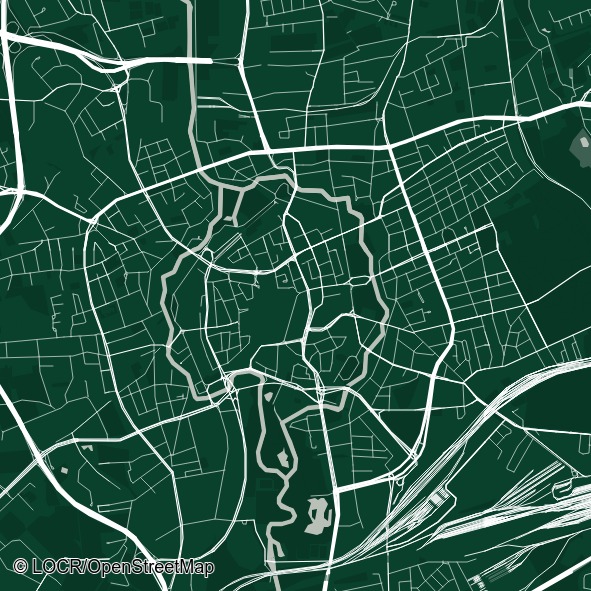
3611
“Minimal Mono Dark Green”
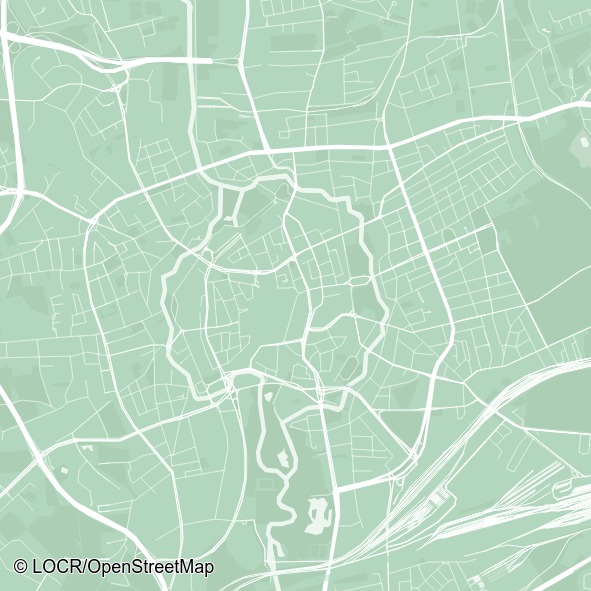
3612
“Minimal Mono Mint”
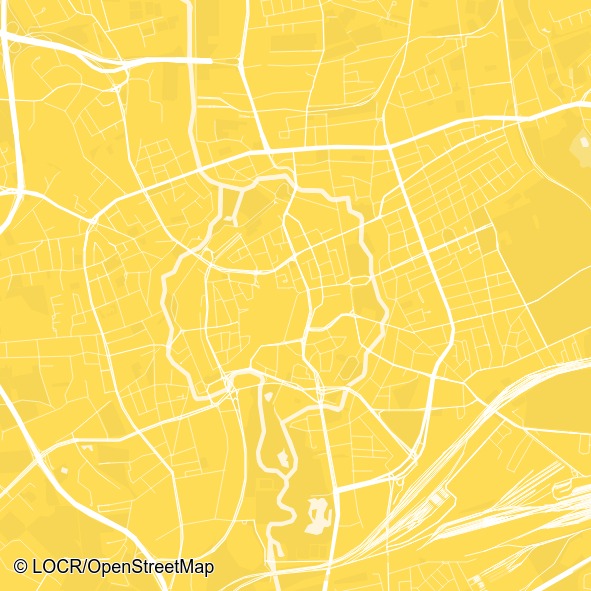
3613
“Minimal Mono Yellow”
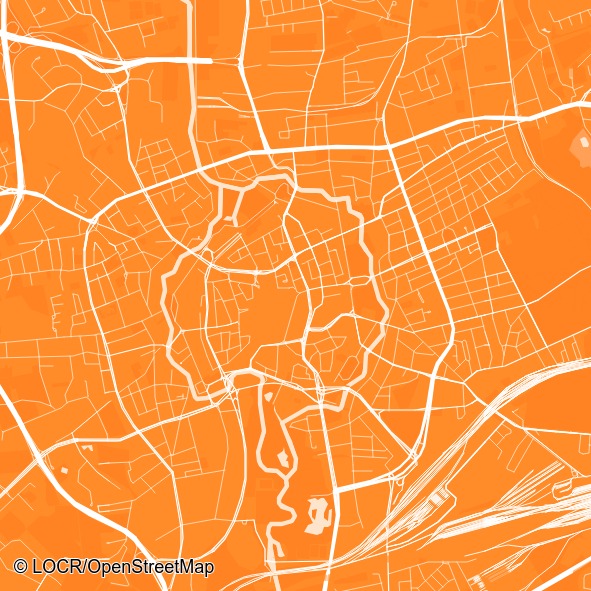
3614
“Minimal Mono Orange”
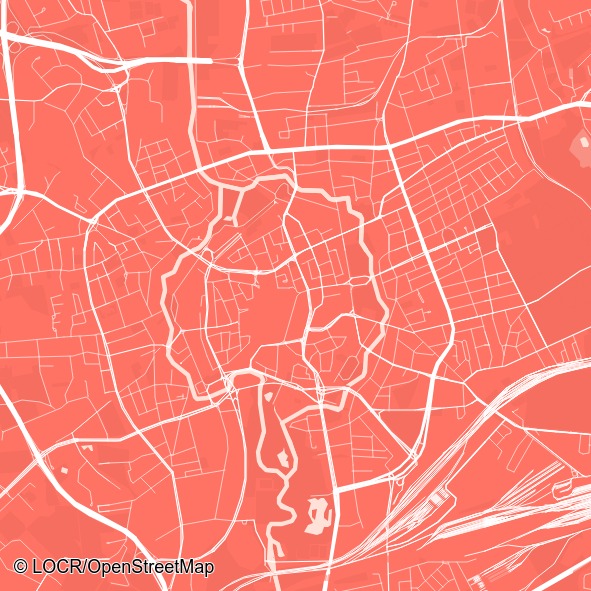
3615
“Minimal Mono Light Red”
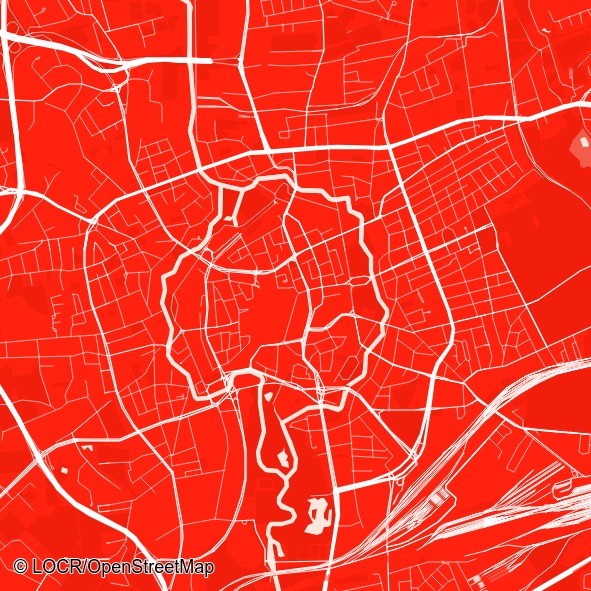
3616
“Minimal Mono Red”
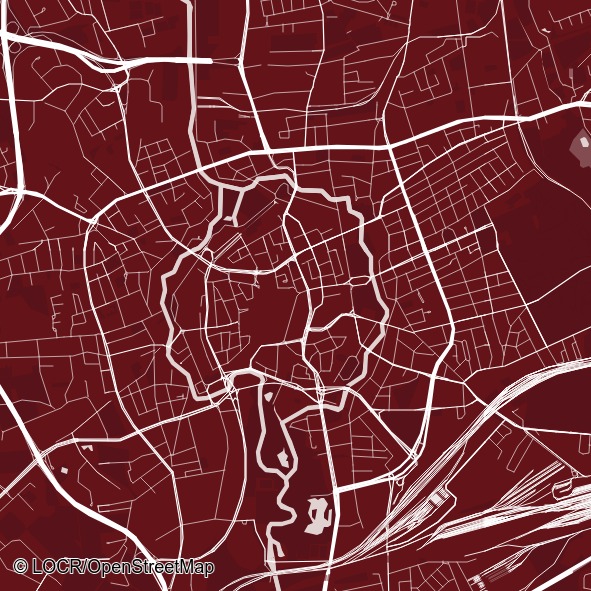
3617
“Minimal Mono Dark Red”
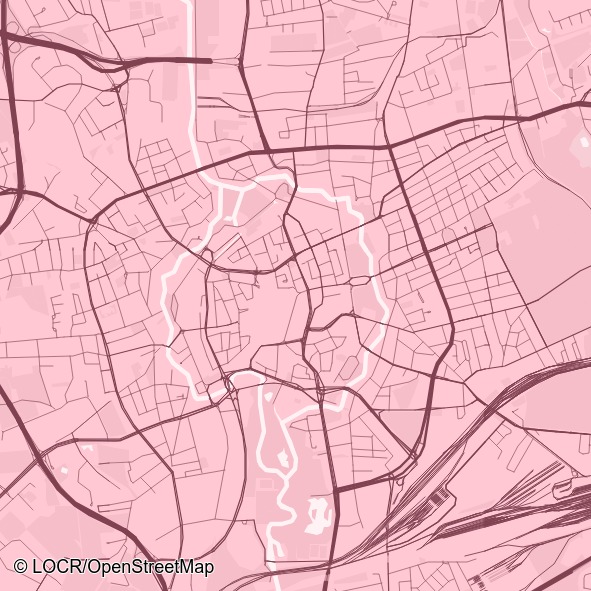
3618
“Minimal Mono Rose”
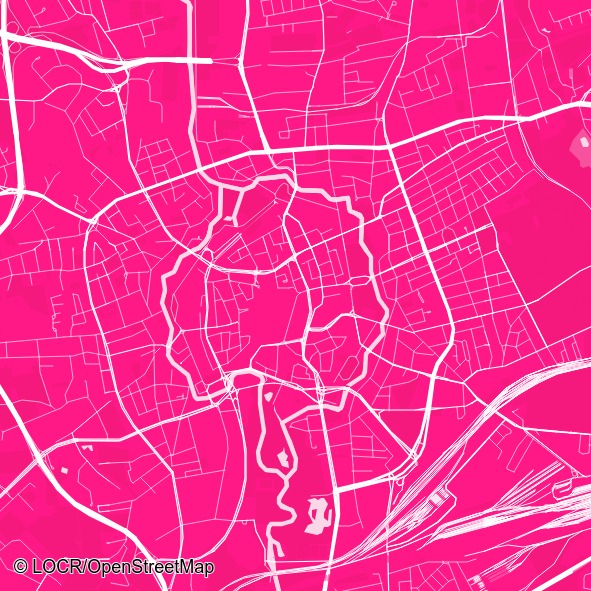
3619
“Minimal Mono Pink”
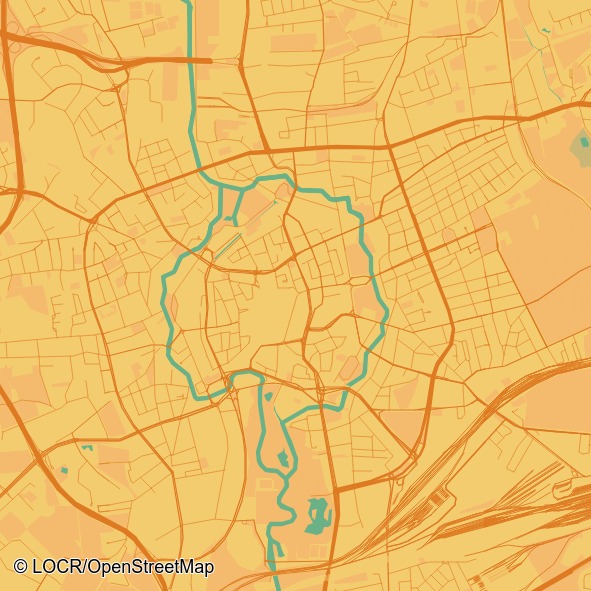
3620
“Minimal Sandy”
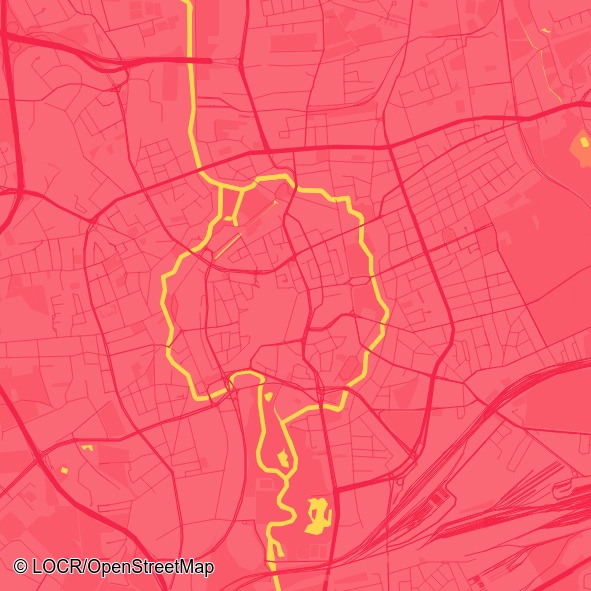
3621
“Minimal Bubblegum”
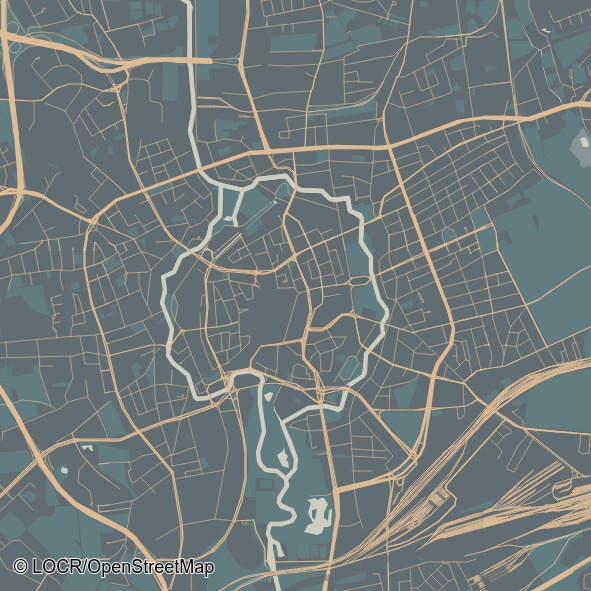
3622
“Minimal Chapp-a-chino”
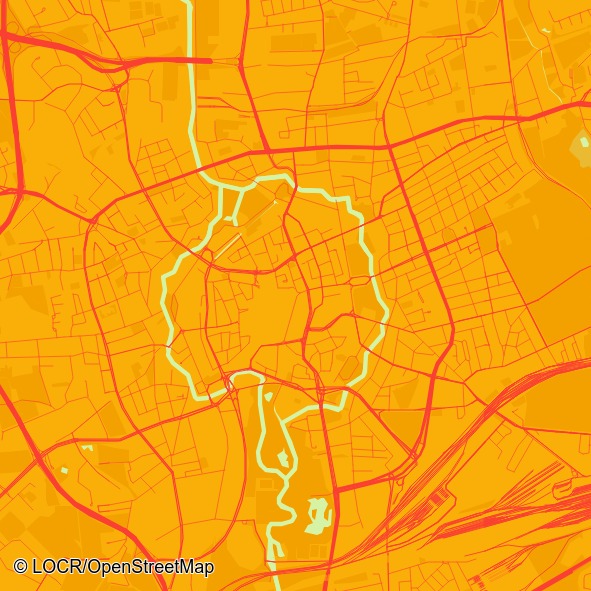
3623
“Minimal John Lemon”
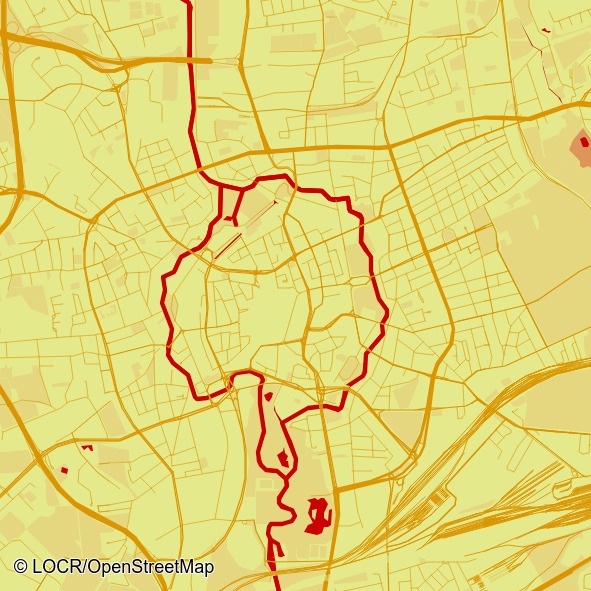
3624
“Minimal Strawberry Lime”
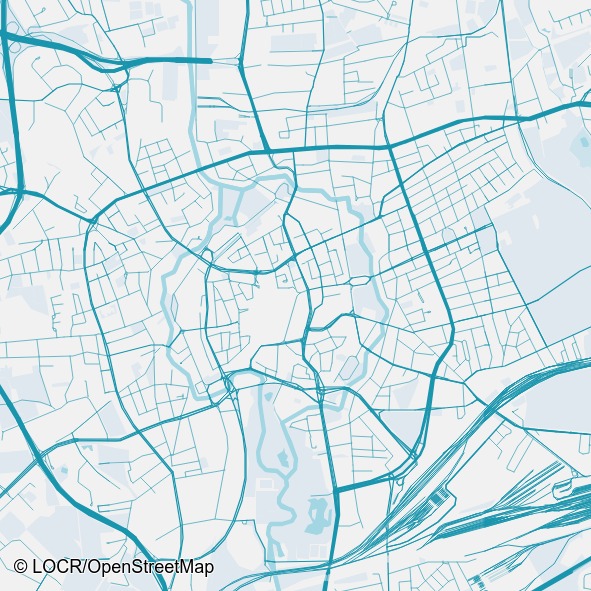
3625
“Minimal Frosty”
- Use the shortcode [locrmaps_styles] to display
- You can change the name displayed in the frontend using the styles textbox
- Add [style name="map style number here" display-name="your display name here"]
- For example it can look like this: [style name="3511" display-name="vintage"]
- A recommended style selection including names looks like this: [style name="3601" display-name="Minimal" overlay-template-base-color="white" overlay-template-text-color="black"] | [style name="3622" display-name="Coffee" overlay-template-base-color="#626d71" overlay-template-text-color="#DFDACE"] |[style name="3511" display-name="Vintage" overlay-template-base-color="#DFDACE" overlay-template-text-color="black"] | [style name="3513" display-name="Drawn" overlay-template-base-color="#b2b2b2" overlay-template-text-color="white"] | [style name="3571" display-name="Comic" overlay-template-base-color="white" overlay-template-text-color="red"]
- By default styles will be displayed as a select box in the front end.
- If you want to display the styles as clickable images, follow these two steps:
- Go to Dashboard/locrMAPS/WooCommerce and for "Layout Selection" choose "WooCommerce Product Property" using the drop down menu.
- Edit your shortcode to [locrmaps_styles styling="wc-product-property"]
Overlay
- To display map overlays use the shortcode [locrmaps_overlay_templates]
- Go to Dashboard/locrMAPS/WooCommerce to define which overlays you want to use. By default the overlays “clean”, “circle”, “heart” & “pin” will be shown.
- The styles you want to select have to be divided by “|”.
- For example: clean | circle | pin
- Currently available overlays are:
- clean, a minimalistic bottom stripe
- circle, a circle shaped overlay
- heart, a heart shaped overlay
- pin, a pin shaped overlay
- It is currently not possible to change the display name for overlays.
- By default overlays will be displayed as a select box in the front end.
- If you want to display the styles as clickable images, follow these two steps:
- Go to Dashboard/locrMAPS/WooCommerce and for “Layout Selection” choose “WooCommerce Product Property” using the drop down menu.
- Edit your shortcode to [locrmaps_overlay_templates styling=”wc-product-property”]
Overlay Base Colors
- To let the customer actively change map base overlays colors use the shortcode [locrmaps_overlay_templates_base_colors]
- Go to Dashboard/locrMAPS/WooCommerce and change the text-field “OverlayTemplates Base Colors” to define an overlay color selection. The default value is “white”.
- The colors you want to add have to be divided by “|”.Colors can be added as:
- text (e.g. black),
- Hash-values (e.g. #000000)
- RGB (e.g. rgb(0,0,0))
- Sample Selection: white | black | #626D71 | #DDBC95 | #DFDACE
- To set a standard color value partnered to a specific map style add overlay-template-base-color=”your color here” to Dashboard/locrMAPS/WooCommerce Text Box Styles. For example: [style name=”3601″ display-name=”Minimal” overlay-template-base-color=”white” overlay-template-text-color=”black”].
- You can do this for every style individually. The overlay color will be changed accordingly.
Overlay Texts
- You can add up to three overlay text-sections on your poster using [locrmaps_text_overlay]
- You can add a headline using [locrmaps_text_overlay overlay-ref-id=”headline”]
- You can add subheadline using [locrmaps_text_overlay overlay-ref-id=”subline”]
- You can add tagline using [locrmaps_text_overlay overlay-ref-id=”tagline”]
- Other possible attributes are:
- value: Defines a pre-defined sample text. For example [locrmaps_text_overlay overlay-ref-id=”headline” value=”your Text here”]
- placeholder: Defines a sample text meant as assistance for an empty text box . For example [locrmaps_text_overlay overlay-ref-id=”headline” placeholder=”your text here”]
- multiline: You can set it to “true” or “yes” if you want to enable multiple lines. For example: [locrmaps_text_overlay overlay-ref-id=”headline” multiline=”true”]
- If you want to display the styles as clickable text boxes in WordPress style, follow these two steps:
- Go to Dashboard/locrMAPS/WooCommerce and for “Layout Selection” choose “WooCommerce Product Property” using the drop down menu.
- Edit your shortcode to [locrmaps_text_overlay overlay-ref-id=”headline” styling=”wc-product-property”]
- It is possible to combine all attributes.
Overlay Text Colors
- To let the customer actively change map text overlays colors use the shortcode [locrmaps_overlay_templates_text_colors]
- Go to Dashboard/locrMAPS/WooCommerce and change the text-field “OverlayTemplates Text Colors” to define an overlay color selection. The default value is “black”.
- The colors you want to add have to be divided by “|”.
- Colors can be added as:
- text (e.g. black),
- Hash-values (e.g. #000000)
- RGB (e.g. rgb(0,0,0))
- Sample Selection: white | black | #626D71 | #DDBC95 | #DFDACE
- To set a standard color value partnered to a specific map style add overlay-template-text-color=”your color here” to Dashboard/locrMAPS/WooCommerce Text Box Styles. For example: [style name=”3601″ display-name=”Minimal” overlay-template-base-color=”white” overlay-template-text-color=”black”].
- You can do this for every style individually. The overlay color will be changed accordingly.
- Display a search bar by using the code [locrmaps_search] to update the icon location on the map.
- To add a new icon, upload a .png file to your WordPress media library. You can download free sample icons here.
- Go to Dashboard/locrMAPS/Icons and click on "Upload/Add Image".
- Upload an icon or choose a file from your media library.
- Find the uploaded icon in the list and click on "Edit". Here you can customize the name, scale and anchor of the icon.
- The anchor field edits the point where the chosen icon connects to the map while closing. Options are "Bottom" which anchors the icon at the bottom center and "Center" which anchors the icon in the center of the image.
- Click on "Save Changes".
- Using the code [locrmaps_icons] you can display all uploaded icons in the front end.
- You can customize the icons selection: Go to Dashboard/locrMAPS/WooCommerce and edit the icons section.
- Use the icon names you defined at Dashboard/locrMAPS/Icons.
- These have to be divided with '|' if you choose to display more than one.
- For example: pin | circle | heart
- If the icons section is empty, all icons will be displayed by default.
- Default icons will be displayed as a select box in the front end.
- If you want to display the icons as clickable images, follow these two steps:
- Go to Dashbard/locrMAPS/WooCommerce and for "Layout Selection" choose "WooCommerce Product Property" using the drop down menu.
- Edit your shortcode to [locrmaps_icons styling="wc-product-property"]
- Use the shortcode [locrmaps_styles] o display a style selection on your website.
- Go to Dashboard/locrMAPS/WooCommerce to define which map styles you want to use. By default the map styles 3511, 3513, 3521 and 3571 will be shown.
- The styles you want to select have to be divided with “|” .
- For example: 3511 | 3513 | 3521
- Styles currently available are:
- 3511, which has a faded vintage look,
- 3513, which has a hand drawn black and white look,
- 3521, which is a minimal blue style and
- 3571, which is a comic style.
Click To Show All Available Map Styles

3511
“Vintage”

3513
“Handdrawn”

3571
“Comic”

3601
“Minimal Mono White”

3602
“Minimal Mono Black”

3603
“Minimal Mono Purple”

3604
“Minimal Mono Lavender”

3605
“Minimal Mono Light Blue”

3606
“Minimal Mono Blue”

3607
“Minimal Mono Dark Blue”

3608
“Minimal Mono Turquoise”

3609
“Minimal Mono Light Green”

3610
“Minimal Mono Green”

3611
“Minimal Mono Dark Green”

3612
“Minimal Mono Mint”

3613
“Minimal Mono Yellow”

3614
“Minimal Mono Orange”

3615
“Minimal Mono Light Red”

3616
“Minimal Mono Red”

3617
“Minimal Mono Dark Red”

3618
“Minimal Mono Rose”

3619
“Minimal Mono Pink”

3620
“Minimal Sandy”

3621
“Minimal Bubblegum”

3622
“Minimal Chapp-a-chino”

3623
“Minimal John Lemon”

3624
“Minimal Strawberry Lime”

3625
“Minimal Frosty”

3511
“Vintage”

3513
“Handdrawn”

3571
“Comic”

3601
“Minimal Mono White”

3602
“Minimal Mono Black”

3603
“Minimal Mono Purple”

3604
“Minimal Mono Lavender”

3605
“Minimal Mono Light Blue”

3606
“Minimal Mono Blue”

3607
“Minimal Mono Dark Blue”

3608
“Minimal Mono Turquoise”

3609
“Minimal Mono Light Green”

3610
“Minimal Mono Green”

3611
“Minimal Mono Dark Green”

3612
“Minimal Mono Mint”

3613
“Minimal Mono Yellow”

3614
“Minimal Mono Orange”

3615
“Minimal Mono Light Red”

3616
“Minimal Mono Red”

3617
“Minimal Mono Dark Red”

3618
“Minimal Mono Rose”

3619
“Minimal Mono Pink”

3620
“Minimal Sandy”

3621
“Minimal Bubblegum”

3622
“Minimal Chapp-a-chino”

3623
“Minimal John Lemon”

3624
“Minimal Strawberry Lime”

3625
“Minimal Frosty”
- Use the shortcode [locrmaps_styles] to display
- You can change the name displayed in the frontend using the styles textbox
- Add [style name="map style number here" display-name="your display name here"]
- For example it can look like this: [style name="3511" display-name="vintage"]
- A recommended style selection including names looks like this: [style name="3601" display-name="Minimal" overlay-template-base-color="white" overlay-template-text-color="black"] | [style name="3622" display-name="Coffee" overlay-template-base-color="#626d71" overlay-template-text-color="#DFDACE"] |[style name="3511" display-name="Vintage" overlay-template-base-color="#DFDACE" overlay-template-text-color="black"] | [style name="3513" display-name="Drawn" overlay-template-base-color="#b2b2b2" overlay-template-text-color="white"] | [style name="3571" display-name="Comic" overlay-template-base-color="white" overlay-template-text-color="red"]
- By default styles will be displayed as a select box in the front end.
- If you want to display the styles as clickable images, follow these two steps:
- Go to Dashboard/locrMAPS/WooCommerce and for "Layout Selection" choose "WooCommerce Product Property" using the drop down menu.
- Edit your shortcode to [locrmaps_styles styling="wc-product-property"]
- To display map overlays use the shortcode [locrmaps_overlay_templates]
- Go to Dashboard/locrMAPS/WooCommerce to define which overlays you want to use. By default the overlays “clean”, “circle”, “heart” & “pin” will be shown.
- The styles you want to select have to be divided by “|”.
- For example: clean | circle | pin
- Currently available overlays are:
- clean, a minimalistic bottom stripe
- circle, a circle shaped overlay
- heart, a heart shaped overlay
- pin, a pin shaped overlay
- It is currently not possible to change the display name for overlays.
- By default overlays will be displayed as a select box in the front end.
- If you want to display the styles as clickable images, follow these two steps:
- Go to Dashboard/locrMAPS/WooCommerce and for “Layout Selection” choose “WooCommerce Product Property” using the drop down menu.
- Edit your shortcode to [locrmaps_overlay_templates styling=”wc-product-property”]
- To let the customer actively change map base overlays colors use the shortcode [locrmaps_overlay_templates_base_colors]
- Go to Dashboard/locrMAPS/WooCommerce and change the text-field “OverlayTemplates Base Colors” to define an overlay color selection. The default value is “white”.
- The colors you want to add have to be divided by “|”.Colors can be added as:
- text (e.g. black),
- Hash-values (e.g. #000000)
- RGB (e.g. rgb(0,0,0))
- Sample Selection: white | black | #626D71 | #DDBC95 | #DFDACE
- To set a standard color value partnered to a specific map style add overlay-template-base-color=”your color here” to Dashboard/locrMAPS/WooCommerce Text Box Styles. For example: [style name=”3601″ display-name=”Minimal” overlay-template-base-color=”white” overlay-template-text-color=”black”].
- You can do this for every style individually. The overlay color will be changed accordingly.
- You can add up to three overlay text-sections on your poster using [locrmaps_text_overlay]
- You can add a headline using [locrmaps_text_overlay overlay-ref-id=”headline”]
- You can add subheadline using [locrmaps_text_overlay overlay-ref-id=”subline”]
- You can add tagline using [locrmaps_text_overlay overlay-ref-id=”tagline”]
- Other possible attributes are:
- value: Defines a pre-defined sample text. For example [locrmaps_text_overlay overlay-ref-id=”headline” value=”your Text here”]
- placeholder: Defines a sample text meant as assistance for an empty text box . For example [locrmaps_text_overlay overlay-ref-id=”headline” placeholder=”your text here”]
- multiline: You can set it to “true” or “yes” if you want to enable multiple lines. For example: [locrmaps_text_overlay overlay-ref-id=”headline” multiline=”true”]
- If you want to display the styles as clickable text boxes in WordPress style, follow these two steps:
- Go to Dashboard/locrMAPS/WooCommerce and for “Layout Selection” choose “WooCommerce Product Property” using the drop down menu.
- Edit your shortcode to [locrmaps_text_overlay overlay-ref-id=”headline” styling=”wc-product-property”]
- It is possible to combine all attributes.
- To let the customer actively change map text overlays colors use the shortcode [locrmaps_overlay_templates_text_colors]
- Go to Dashboard/locrMAPS/WooCommerce and change the text-field “OverlayTemplates Text Colors” to define an overlay color selection. The default value is “black”.
- The colors you want to add have to be divided by “|”.
- Colors can be added as:
- text (e.g. black),
- Hash-values (e.g. #000000)
- RGB (e.g. rgb(0,0,0))
- Sample Selection: white | black | #626D71 | #DDBC95 | #DFDACE
- To set a standard color value partnered to a specific map style add overlay-template-text-color=”your color here” to Dashboard/locrMAPS/WooCommerce Text Box Styles. For example: [style name=”3601″ display-name=”Minimal” overlay-template-base-color=”white” overlay-template-text-color=”black”].
- You can do this for every style individually. The overlay color will be changed accordingly.
